Views: 220 Author: plastic-material Publish Time: 2026-03-09 Origin: Site


Content Menu
● Understanding Plastic Injection Molding
● Basic Principles of the Process
● Main Components of an Injection Molding System
>> Mold Tooling
● Step‑by‑Step Injection Molding Process
>> Step 1: Material Selection and Preparation
>> Step 2: Feeding and Plasticizing
>> Step 4: Injection and Packing
>> Step 5: Cooling and Solidification
>> Step 6: Mold Opening and Ejection
● Designing Parts for Injection Molding
>> Wall Thickness and Uniformity
● Process Parameters and Their Effects
>> Injection Speed and Pressure
>> Cooling Time and Cycle Optimization
● Common Defects and How to Prevent Them
>> Flash, Short Shots, and Sinks
>> Warpage and Dimensional Issues
>> Surface Defects and Weld Lines
● Safety and Maintenance Considerations
>> Machine and Operator Safety
>> Mold Care and Machine Maintenance
● Getting Started as a Beginner
>> Learning and Continuous Improvement
Plastic injection molding is one of the most widely used methods to mass‑produce precise plastic parts at low cost. It involves melting plastic pellets and forcing the molten material into a steel mold where it cools and solidifies into the final shape.

Injection molding is a cyclic manufacturing process that converts raw thermoplastic pellets into finished parts using heat, pressure, and a tightly clamped mold. Each cycle repeats the same sequence: closing the mold, injecting plastic, cooling, and ejecting the part.
This process is popular because it can produce complex geometries with excellent repeatability and minimal post‑processing. It also supports high levels of automation, making it ideal for large production runs in automotive, consumer goods, medical, and electronics industries.
At its core, injection molding relies on three key elements: the molding machine, the mold, and the plastic material. The machine provides the clamping force and the injection pressure, the mold defines the part geometry, and the plastic delivers the required performance and appearance.
During each cycle, plastic pellets are melted by heaters and shear forces in a rotating screw barrel and then injected into a closed mold cavity. After cooling, the mold opens and ejector mechanisms push the part out, ready for trimming, inspection, or assembly.
The injection molding machine has two main units: the clamping unit and the injection unit. The clamping unit opens and closes the mold and applies the force needed to keep it closed during injection. The injection unit melts the plastic and drives it into the mold cavity.
Machines are usually rated by clamping force, often ranging from a few tons for micro parts to thousands of tons for large products. The required clamping force depends on part size, projected area, and injection pressure; undersized machines can lead to flash and dimensional issues.
The mold is a precision metal tool, typically made from hardened steel or sometimes aluminum for lower‑volume production. It consists of two halves: the cavity side and the core side, which together form the negative shape of the part.
Inside the mold, there are features such as runners, gates, vents, cooling channels, and ejector pins. These features control how the plastic flows, how heat is removed, and how the part is released. Good mold design is crucial for part quality, cycle time, and tool longevity.
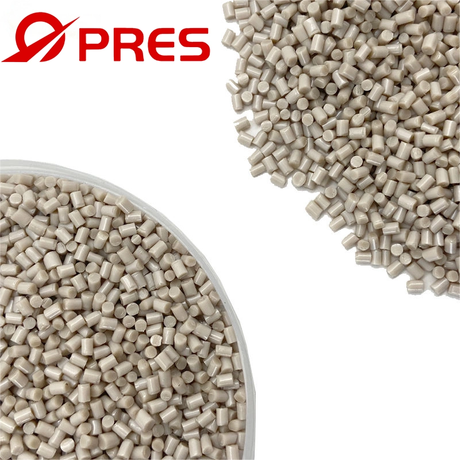
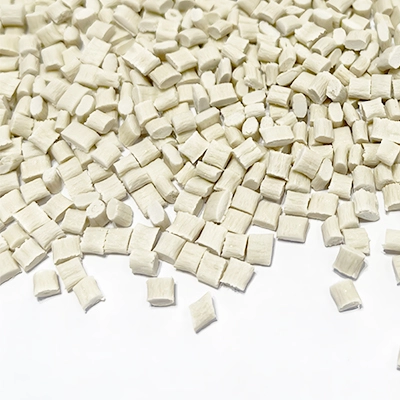
Most injection molded parts use thermoplastic materials, which soften when heated and solidify when cooled. Common choices include polypropylene, polyethylene, ABS, polycarbonate, nylon, and engineering blends tailored to specific mechanical or thermal requirements.
Material selection balances properties such as strength, stiffness, impact resistance, heat resistance, chemical resistance, and cosmetic finish. Designers must also consider shrinkage, flow behavior, and compatibility with the mold design to avoid defects and warpage.
Before molding begins, the proper plastic resin is selected based on functional and regulatory requirements. Factors include operating temperature, mechanical loads, exposure to chemicals or UV light, and any standards for food contact, medical use, or electrical safety.
Resin is often dried to remove moisture that can cause bubbles, splay, or reduced strength. Drying parameters such as temperature and time are set according to the material's datasheet, and dried pellets are usually stored in sealed containers or hoppers to avoid reabsorption of moisture.
Dried pellets are fed from a hopper into the machine's barrel by gravity. A rotating screw inside the heated barrel drags pellets forward, where they are melted by a combination of external heater bands and shear heating from the screw's rotation.
As the plastic melts, it accumulates in front of the screw, forming a shot of molten material ready to be injected. The screw gradually moves backward as it builds up this shot volume, and back pressure can be adjusted to improve melt mixing and temperature uniformity.
Before injection, the mold halves close and clamp together under a defined force. The clamping unit moves the moving platen until the mold closes and then applies additional force to lock it. This ensures no gap opens during injection, which would otherwise cause flash.
Clamping force must exceed the cavity pressure acting over the projected area of the part and runner system. Setting the clamping force too low risks flash and dimensional variability, while unnecessary excess force can accelerate mold wear and energy consumption.
Once clamped, the machine switches to the injection phase. The screw moves forward like a plunger, pushing the molten plastic through the nozzle, sprue, runners, and gates into the mold cavity. This stage must fill the cavity quickly enough to avoid premature solidification.
After the cavity is filled, the process transitions to a packing or holding phase. In this phase, the machine maintains pressure on the melt to compensate for volumetric shrinkage as the plastic begins to cool. Proper packing reduces sink marks, voids, and dimensional deviations.
With the cavity filled and packed, the plastic cools and solidifies against the mold walls. Cooling channels inside the mold circulate water or other fluids to extract heat and control mold temperature, which directly affects part quality and cycle time.
Cooling is often the longest part of the cycle. Designers adjust wall thickness, cooling line layout, and coolant conditions to minimize cooling time without compromising performance. Uneven cooling can cause warpage, internal stresses, and inconsistent dimensions.
When the part has cooled sufficiently, the clamping unit opens the mold. The moving half retracts, exposing the part, which usually remains attached to the core side. Ejector pins, stripper plates, or other mechanisms then push the part out of the mold.
Ejection must be strong enough to remove the part but gentle enough to avoid marks or damage on critical surfaces. Draft angles on vertical walls, smooth mold finishes, and well‑placed ejector pins all contribute to reliable and clean part release.
Consistent wall thickness is one of the most important guidelines in injection‑molded part design. Sudden changes in thickness create uneven cooling, which can lead to warpage, sink marks, and internal stresses.
Designers usually target the thinnest wall that still meets mechanical requirements. Ribs, gussets, and other reinforcing features can increase stiffness without significantly increasing wall thickness, helping manage cooling time and material usage.
Draft is a small taper on vertical surfaces that helps parts release from the mold. Without draft, friction between the part and cavity walls can cause sticking, scuffing, or damage during ejection.
Typical draft angles range from fractions of a degree on polished surfaces to several degrees on textured surfaces. The required draft depends on material properties, surface finish, and part geometry; deeper ribs or bosses often need more draft.
Ribs are thin features used to stiffen walls, while bosses are cylindrical features for screws, inserts, or alignment. Both should be designed to avoid excessive thickness at their base, usually by keeping them a fraction of the adjoining wall thickness.
Sharp internal corners concentrate stress and hinder flow, so fillets and radii are used to smooth transitions. Balanced and symmetrical geometry helps plastic flow evenly, reduces the risk of voids or weld lines, and improves dimensional stability.
The runner system distributes molten plastic from the sprue to one or more cavities. Designers choose between cold runner and hot runner systems, depending on volume, material, and cost targets.
Gates are the small openings where plastic enters the cavity. Gate type, size, and location affect filling pattern, cosmetic appearance, and the risk of defects. Proper placement helps vent trapped air, reduce weld lines on critical surfaces, and control packing.
Cooling channels are drilled or formed inside the mold to carry circulating coolant and remove heat from the plastic. Their layout, diameter, and distance from the cavity surface are tailored to achieve uniform cooling across the part.
Advanced molds may use conformal cooling, where channels follow the contour of the part using additive manufacturing techniques. This can significantly cut cycle times and improve dimensional consistency compared to traditional straight‑drilled channels.
Vents are tiny gaps or slots that allow trapped air and gases to escape during filling. Without adequate venting, gas traps can cause burn marks, short shots, or inconsistent filling.
The parting line is where the two mold halves meet, and it often defines where small parting flash might occur. Early planning of the parting line helps manage cosmetic expectations, draft directions, and the placement of sliders or lifters for undercuts.
Barrel temperature, mold temperature, and nozzle temperature must match the material's processing window. Too low and the plastic may not flow properly, causing short shots or high internal stress; too high and the polymer may degrade, discolor, or emit fumes.
Mold temperature influences surface finish, shrinkage, and cycle time. Higher mold temperatures often improve surface quality and dimensional stability but lengthen cooling time, while lower mold temperatures shorten cycles but can increase residual stress and warpage.
Injection speed controls how quickly the cavity fills. High speeds can improve weld line strength and reduce flow marks, but they may also cause jetting or burn marks if vents and gating are inadequate. Lower speeds provide gentler filling but risk premature solidification.
Injection and packing pressures determine how tightly the cavity is packed with material. Insufficient pressure can lead to voids and sinks, while excessive pressure can cause flash, part sticking, or mold damage. Optimization requires balancing these outcomes.
Cooling time must be long enough for the part to become rigid enough for ejection but not so long that the machine sits idle unnecessarily. Many molders start with a conservative cooling time and then reduce it in small steps while monitoring part shape and stability.
Cycle optimization aims to minimize overall cycle time without compromising quality. Techniques include improving cooling efficiency, fine‑tuning packing and holding times, and adjusting screw recovery settings to ensure the next shot is ready when the mold is.
Flash occurs when molten plastic escapes through gaps at the mold parting line or around inserts. It is often controlled by increasing clamping force, improving mold fit, or reducing injection pressure.
Short shots happen when the cavity does not fill completely, resulting in missing features or incomplete parts. Solutions include raising melt or mold temperature, increasing injection speed or pressure, or adjusting venting and gate design to improve flow.
Sink marks are small depressions on the surface, typically above thick ribs or bosses. Reducing feature thickness, improving packing pressure and time, and designing more uniform wall sections can help reduce sinks.
Warpage is distortion caused by uneven shrinkage or residual stresses. It is influenced by material choice, part geometry, gate location, and cooling uniformity.
Reducing warpage often involves making wall thickness more uniform, adjusting gate placement, changing mold temperature balance, or selecting a material with lower shrinkage and better dimensional stability.
Surface defects such as flow lines, burn marks, and jetting can result from improper temperature, speed, or venting. Tuning process settings and improving gate and vent design usually mitigates these issues.
Weld lines form where two flow fronts meet and can be weak or visible. Moving the gate, changing flow path, increasing melt temperature, or raising injection speed can improve weld line strength and appearance.
Injection molding machines operate under high pressure and temperature, so proper guarding and interlocks are essential. Operators should follow lockout/tagout procedures during maintenance and avoid reaching into the mold area when the machine is live.
Personal protective equipment such as heat‑resistant gloves, safety glasses, and protective clothing helps prevent burns and injuries from hot plastic or components. Training and clear procedures are key to maintaining a safe work environment.
Regular mold maintenance includes cleaning vents, runners, and cavity surfaces, checking for wear or corrosion, and lubricating moving components. Good storage practices protect molds from rust and physical damage between runs.
Machine maintenance covers checking hydraulic systems, heaters, sensors, and electrical components. Consistent preventive maintenance reduces downtime, improves consistency, and extends equipment life.
Beginners often start with simple parts and low‑cost molds or even prototype tools made from softer materials. Trial runs help validate part design, mold design, and process parameters before committing to high‑volume production.
Small adjustments based on first‑article inspection can significantly improve quality and yield. Documenting successful settings and lessons learned builds a solid foundation for future projects.
Injection molding combines material science, mechanical engineering, and practical experience. New molders benefit from studying material datasheets, visiting molding shops, and analyzing real parts for defects and features.
Over time, collecting data, monitoring process trends, and experimenting with controlled changes leads to more stable processes and better‑performing parts. Continuous improvement is an integral part of successful molding operations.

1. What materials are commonly used for plastic injection molding?
Common materials include polypropylene, polyethylene, ABS, polycarbonate, and nylon, along with many engineering blends tailored for higher strength, heat resistance, or specialty applications.
2. How long does an injection molding cycle take?
Cycle time can range from a few seconds for small, thin‑walled parts to over a minute for large or thick components, depending on part design, material, and cooling efficiency.
3. What is the difference between hot runner and cold runner systems?
A hot runner keeps plastic molten inside heated channels, reducing material waste and improving flow, while a cold runner solidifies with each cycle and is usually trimmed off and sometimes re‑ground for reuse.
4. Why is draft angle important in part design?
Draft allows parts to be ejected from the mold without sticking or scratching critical surfaces, reducing the risk of damage and minimizing ejection forces and cycle time.
5. How can I reduce defects in my molded parts?
Defect reduction typically involves improving part and mold design, optimizing temperatures, pressures, and speeds, and ensuring correct material handling, drying, and machine maintenance.
6. Do I always need a high‑precision hardened steel mold?
Not always; for low‑volume or prototype runs, aluminum or softer steel molds can be cost‑effective, though they may wear faster and limit the number of good parts produced before refurbishment.
7. Can recycled plastic be used in injection molding?
Yes, many applications allow some percentage of regrind or recycled material, but the acceptable level depends on mechanical requirements, cosmetic standards, and any regulatory or safety constraints.
Hot Tags: China, Global, OEM, private label, manufacturers, factory, suppliers, manufacturing company